Friday, December 31, 2010
Thursday, December 30, 2010
Leopard Jean Jacket - Sleeves

Tuesday, December 28, 2010
Leopard Jean Jacket - On Seam Pockets

Wednesday, December 22, 2010
Leopard Jean Jacket - Back
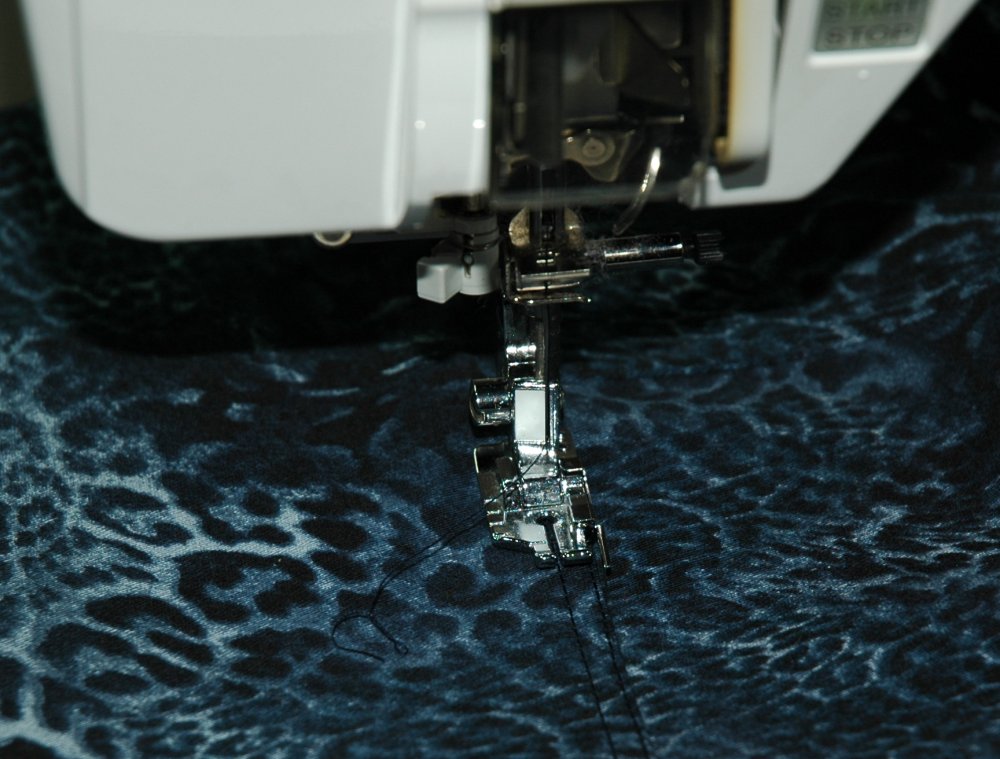

Pictured here are my favorite feet to use: left is the 1/4" foot with guide and on the right is the edge join foot. You get really nice, even top-stitching for seams.

Here's a picture of the back all assembled. Sorry the picture is so dark. There's just not enough light in my sewing for really good pictures. Remember you can click on the picture to enlarge it. The pattern of the fabric is really pretty when you can see it clearer.
I just LOVE this fabric. LOL
Monday, December 20, 2010
Leopard Jean Jacket - Tissue test fit

I just traced out and test fit the front of the pattern on some old sew-in interfacing I'm trying to use up. Its test fit to the front of my dummy. I'm in the process right now of cutting out all of the pattern pieces and then I'll start to layout the fabric and get those pieces cut out too. Depending on how things go, it could take me a day or two to get it done. This pattern is sized by XS-S-M-L-XL. I cut a medium up top and graded down to a large in the hip area which are my usual changes.
Sunday, December 19, 2010
Leopard Jean Jacket - KS2895
I was roving around the other blogs I follow and stumbled across a jacket challenge. I'm going to try to follow along; I don't think I'll be able to make the 12 jackets (1 a month) but I hope to complete a few. The first will be a jean jacket in a cool leopard denim print I found at our local fabric store theclothmerchants.com
 I'm going to use Kwik Sew 2895 View A. Neither view has on seam pockets nor is it lined so I'm going to add pockets & lining. Here's a picture of the pattern and my fabrics. Obtw, I purchased the lining at Jo Ann's. Just finished washing up both of them. I hope to get started sometime today tracing out the pattern. I'm going to get my bike ride (12 miles) in and then we'll see.

Leftover fabric...


This last photo shows the completed top. I had a bit of trouble trying to get the "V" part of the binding right. The directions in the pattern were awful for installing the neck binding. So I had to wing it. LOL. Either I need more practice doing this particular technique or I need to avoid it by making round necks.
Saturday, December 18, 2010
Xmas Mojo got up and went...
At least for this project, UGH, I have been trying for days to make this shirt work. I think I'm going to put it aside for now when I have more inspiration working for me. I just can't seem to get my head to concentrate on it. My mind keeps wandering to other projects. Sigh. So like me. LOL.
Sunday, December 12, 2010
Christmas Blouse

I've been toying with the idea of creating a Christmas themed blouse for some time now. Yeah...I know; I've procrastinated quite a while with it. I've been trying to work out the details in my head and its not going that well this time. So I figure I'll just get it out and try playing around. Its going to be based on the Threads Gender Bender shirt from issue 150 and the fabrics I've chosen are LOUD. LOL. This pretty much the idea I used to make the ladybug blouse. I've collected the fabrics and have done a couple of test embroidery ideas. First the pattern I'll use is my TNT Kwik Sew 3555. I've made this twice now and really like the fit and how simple it is. Plus I really like the tailored look of shirts. I'm just a shirt and jeans gal at heart.

These are the fabrics I've collected for the shirt. I warned you; they are very bright. lol.

These are a couple of ideas I had with embroidery for the front pocket. The first would be a white pocket on the front of the red & green stripe fabric that will be the body of the shirt. I brought the holly design into Designer's Gallery CustomWorks II and then added a couple of satin stitch lines with the aid of QuiltWorks which I have installed as a tool under CustomWorks. I'm not sure I like it yet. I may have to play around with it some more.

This second sample is the same fabric the body of the shirt will be composed of and I was just seeing what I thought of the holly design against it. I kind of like it. Its rather subtle, but what does subtle have to do with LOUD colors. Grin. But I'm thinking I like the white pocket more.
The reason I'm messing with the embroidery first is because the pocket is one of the first things you sew on the shirt. I'm also thinking of using the holly design on the inside collar stand on white fabric. That way you'll actually see the fabric when the neck is worn open, which I most always do. We'll see; so far its just a thought.
I think I'll wrap a few presents and think about this for awhile. LOL. I'm procrastination at its best.
Saturday, December 11, 2010
Threads Prize Package!

Sandra Betzina - V1085

I've been thinking of sewing more knits for winter and rediscovered this pretty fabric in my stash. Its got 4 way stretch and is a nice sweater knit.
I have purchased several Sandra Betzina patterns in the past but haven't had a chance to make any of them up yet. Well yesterday I finally got to it. I prewashed the fabric and laid it out on my cutting table to let it "relax". Its pretty stretchy so I let it lie for 24 hours. The pattern for the shirt I'm making is V1085 and I made the cowl neck view A, show below in the grey and white stripes.

I took Sandra's Fit Class when she came to Tulsa early this year (before I lost weight) and had to change the Letters for size. I chose D for the bust and graded up to an E for the waist and hip area. I like shirts to "skim" my waist and hips; not cling tightly like the styles reflect now. I just don't think showing how many rolls you have around the waist is attractive, I don't care how young you are. Just seeing all these young girls showing all that fat around the middle is sad and shows how out of shape America is and how most are a slave to fashion. There, I said it. I'm off my soapbox for today. LOL.
Okay, back to sewing. I found the pattern directions very good. I followed them for the most part. I used the needle requested for sewing (70/10HM) and a narrow zigzag of 1.0mm width & 2.5mm length. I attached the raglan sleeves to both front and back then tried it on for fit. It mentions in the pattern there is one inch seam allowances on the side seams for "fit". I found Using 5/8" was just right for me. Once I determined that the fit was right, I sewed more seams and serged them all for a nice finish. I used my cover stitch machine to hem the 3/4 length sleeves and the hem of the garment. Oh, let me mention I reduced the length by 1 inch and gave it an 1 1/2 inch hem. The pattern suggest 5/8" for a hem. Let me say that was way longer looking than the picture on the front of the pattern showed. The last thing you do is attach the band for the neckline. That was really easy. You also create a little pouch for a weight to keep the neckline in place. All in all, I really love the top and have been wearing it since it was finished. I'd recommend it to others and I'll make a couple more myself. Here's a picture of me wearing the finished top. I love it!

And here is a close up of the neckline area.

Friday, December 10, 2010
Infinity Scarf...
I've been on a knitting kick lately. Everyone is getting a knitted scarf for Christmas. LOL. Even me. Thought you might like to see this one. It's my first attempt at an infinity scarf. A very easy pattern of k4, p4 with a k1,p1 border. This ought to go with my coat pretty nicely.

All I have left to do is twist it and sew the edges together to create the "Infinity" effect.

All I have left to do is twist it and sew the edges together to create the "Infinity" effect.
Wednesday, December 1, 2010
Inspired by Threads Contest winner!

I won!!! How cool is that???? LOL. My shirt "Candlewick N Roses" won the contest. Thanks so much for voting for my shirt! I know I'm late in getting this announcement out, but whooiee, its been busy here lately! This the first time I've ever entered a contest with any of my garments. That's the winning shirt above.
And here is the addy to see the winner announcement at Threads on-line. http://www.threadsmagazine.com/item/17086/and-the-winner-of-the-inspired-by-threads-contest-is
I'm still on cloud nine... LOL
Subscribe to:
Posts (Atom)